While I believe there's no "incorrect" way to apply blush, I do think that certain blush placements can not only give you that healthy flush of color we are all after, but also trully sculpt and give definition to your face.
High-Up Blush Placement for Defined Cheekbones
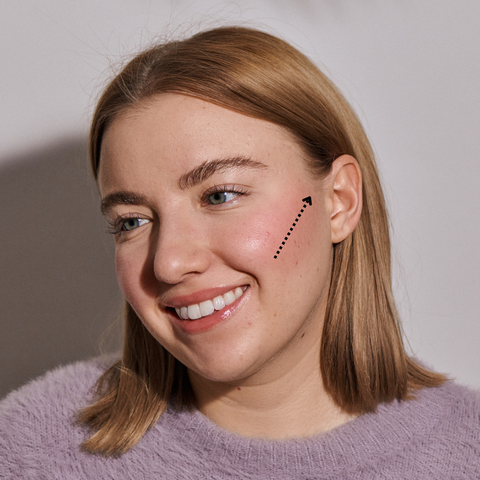
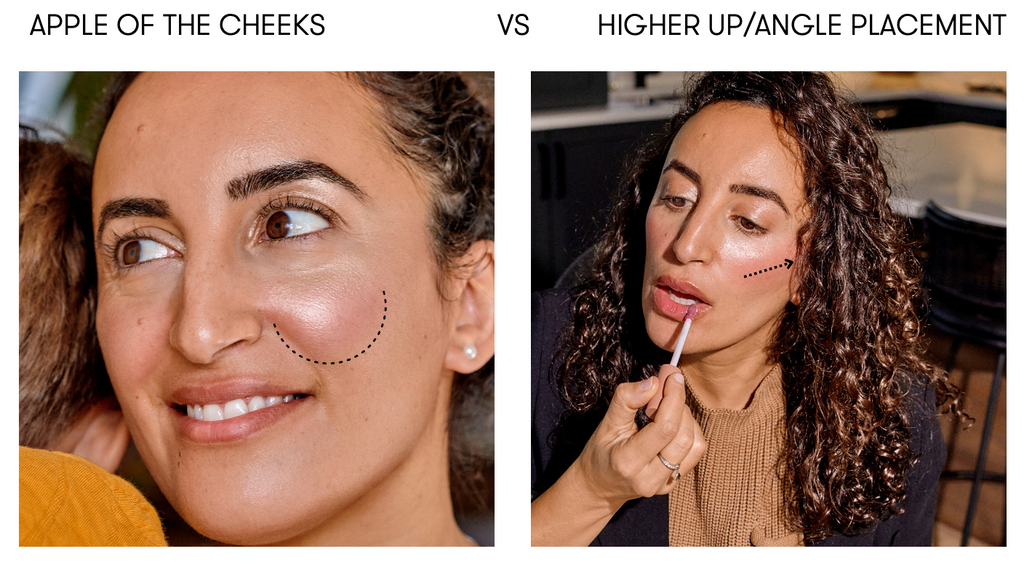
My favorite placement for myself and my customers is to applying blush from the side of the apple of your cheek upwards toward the temple creates a lifted, defined cheekbone. This placement acts almost like a contour, giving your cheeks a snatched and elegant look. It's not just about accentuating cheeks; it's about sculpting your face for a more refined appearance.

Apple of the Cheeks for a Youthful Glow
Applying blush solely on the apples of the cheeks imparts a youthful look. However, be mindful that it can sometimes make your cheeks appear a bit more weighed down. For a balanced effect, blend the blush slightly upwards and outwards to lift the face.

Bridge of the Nose for a Sun-Kissed Look
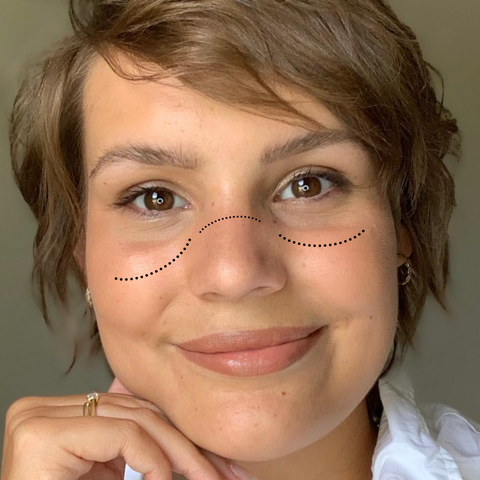
For an even more natural look, apply a bit of blush to the bridge of your nose. This mimics the sunburnt, beachy look where our face naturally tans first. While social media trends like Hailey Bieber's strawberry girl look have taken this idea to new extremes, the key is to find a placement that enhances your natural complexion without overdoing it. Try this with Minori's Scarlet Cream Blush.

Monochrome Look
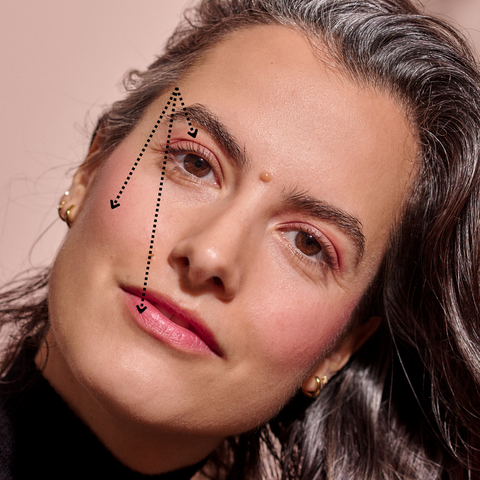
One of my favorite blush looks, is to also add a bit of blush onto my eyelids. Since I'm not a big eyeshadow person, blending a bit of cream blush into my eyelids is super easy and requires zero eyeshadow blending skills. I apply it right above my fold and it instantly gives me a very put together, warm look. If the blush shade is close to my natural lip color, like Minori's shade Orchid, I will also apply it to the lips for a full monochrome look.
Here is an example of our beautiful model Lucy wearing Minori's Cream Blush in Orchid on her eyes, lips and cheeks.

This is a reminder of how versatile cream blush can be when purchased in a natural, wearable, everyday shade.
Proper Blending of the Blush
More important than placement is blending the blush well. Minori's cream blushes blend effortlessly due to their cream-to-powder formula that spreads like butter on the skin and dries down to a soft, velvety, lightweight feel. However, some blushes can be on the stickier, harder side. If you are struggling to blend a particular blush, try applying it with a brush instead.
Skin Prep for Smoother Blush Application
Another tip is to provide your skin with a nice layer of moisture before applying blush. If your skin is extremely dry, it will make blending blush more challenging. A layer of moisturizer and sunscreen will give your blush a smoother, softer canvas to blend out on.
The Impact of Blush
In my opinion, out of all the different makeup steps we can choose from, blush is one that makes the most visible impact. I feel like I look better with just wearing a bit of blush, even more so than if I even out my whole complexion by wearing foundation. Blush makes me look healthier, warmed up, and more awake!

